Sunday, July 31, 2011

Dog Lake

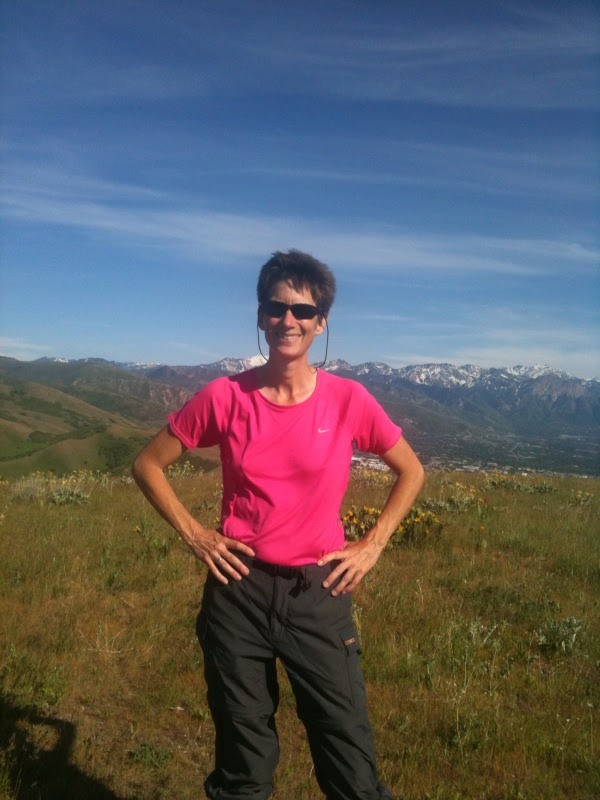
We finally made it to the upper trails in Millcreek Canyon.  We needed a leisurely hike this afternoon after a busy weekend and Dog Lake is just the ticket.  This hike is about 6 miles roundtrip and provides some great scenary through the aspen and pine trees.  This trail used to be my favorite after-work mountain bike ride.  It stays cool up the canyon even on hot summer days.  The elevation gain is only about 1,200' in 3 miles so the hike feels more like a walk.


Trailhead Elevation:  7,545 ft
Dog Lake Elevation:  8,745 ft
Total Elevation Gain:  1,200 ft
Total Distance:  6 miles
Total Time:  3.25 hours

Sunday, July 24, 2011

Grays Peak, Colorado

For our second hike of the Colorado 14er weekend, we climbed Grays Peak.  This was a beautiful hike through alpine valleys and then up an interminable mountain of gray shale switchbacks.  After our epic day yesterday, I wasn't sure I was going to make it all the way to the top, but the adrenaline kicked in at the end, and before we knew it, we were at the top.  The views from the top looking out over the sea of mountains and peaks was awesome.  It was another amazing day on the trail.  Our spirits run high.


Trailhead Elevation:  11,280 feet
Grays Peak:  14,270 feet
Total Elevation Gain:  3,000 feet
Total Distance:  8 miles
Total Time:  6.5 hours

Saturday, July 23, 2011

Mt. Lincoln, Colorado

We went to Colorado this weekend to try to climb some 14,000' peaks.  We camped at about 9,000' at the Prospector Campground near Dillon, Colorado.  The weekend was a great success and great practice for Kilimanjaro.  I started out too fast for the first climb and got a little winded and a bit nauseous, but as soon as I slowed down, things went pretty smoothly.  We actually did three 14,000' peaks in one day, doing the Mt. Cameron, Mt. Lincoln and Mt. Bross loop from the Kite Lake Trailhead.  It was a beautiful day and a great epic hike.  "Holy Capuchin!"

Trailhead Elevation:  12,000'
Mt. Cameron:  14,239'
Mt. Lincoln:  14,286'
Mt. Bross:  14,172'
Total Elevation Gain:  2,736'
Total Distance:  6 miles
Total Time:  5hrs 50min

Friday, July 15, 2011

Injury Time-Out

Well, I haven't hike for two weeks now.  I think my training schedule was a bit too much and I have succumbed to a bad case of tendonitis in my achilles heel and plantar faciitis on the bottom of my foot.  I have been stretching and icing and trying to let them heal, but no real progress has occurred.  The best treatment for the plantar faciitis seems to be some shoe inserts that redistribute my weight to the balls of my feet rather than the heels.  Ibuprofen works pretty well too.  In the interim, I am training on my road bike.  Let's just hope I can do the training hikes in Colorado next weekend.

Thursday, July 14, 2011

Moivaro Lodge, Arusha

We decided to splurge a little for our post-climb accommodations.  I figure we are going to be tired, so a nice place to relax will be worth the money.  We picked the Moivaro Lodge which is located about 7 km outside of Arusha and surrounded by shamba farms and coffee plantations.  There are about 30 individual cottages for guests and beautiful gardens with a view of Mt. Meru.  

http://www.moivaro.com/


Moivaro Lodge
P.O. Box 11297, Arusha, Tanzania
Tel: +255 27 250 6315/86 or Mobile +255 75 432 4193 (24 hours inc.Sat & Sun)
Fax: +255 27 250 6378

Wednesday, July 13, 2011

Kibo Palace Hotel, Arusha

We finally got our hotels booked through Team Kilimanjaro.  Our preferred choices for something more local and rustic were already booked up, so we ended up at the Kibo Palace Hotel for our pre-climb lodging.  This looks like a pretty nice hotel with some decadent amenities, including wi-fi and coffee in the room.  Kibo Palace is located about five minutes from Arusha town center on the Old Moshi Road, and 45 minutes from the Kilimanjaro Airport.

http://www.kibopalacehotel.com/


Kibo Palace Hotel
P.O. Box 2523, Arusha, Tanzania
Tel:  +255 27 254 4472 / 254 8887
Fax:  +255 27 254 8832

Tuesday, July 12, 2011

Go Local

Well, they always say "go local" and in this case it means "get a tour operator working out of your own country."  The time difference between the US to the UK has been frustrating in trying to get in touch with Team Kilimanjaro when we need to.  It also turns out that we are losing hundreds of dollars on the exchange rate for the trip once all the wire transfers go through and the fees are paid.  In hindsight, I would consider going with a US company next time.

Sunday, July 3, 2011

Bowman Fork

Mary was off to Tennessee for the holiday weekend, so Riley and I were on our own for the hike.  We decided to do the Bowman Fork Trail up Millcreek Canyon.  It was a pretty good choice as there was still a lot of water from the runoff.  We hit snow patches around 8,000'.  We didn't make it to the saddle between Mount Raymond and Gobblers Knob, but we got up pretty high after a couple hours of hiking.


Trailhead Elevation:  6,260 ft
Highest Point:  8,488 ft
Total Elevation Gain:  2,228 ft
Total Distance:  8 miles
Total Time:  4.25 hrs

Sunday, June 26, 2011

Sunset

For our final day in the Uintas we did a quick hike called "Sunset."  We figured this would be a hike to a nice viewpoint for seeing the sunset.  Instead it was a nice hike up an unmaintained and long-deserted logging road to a pond.  The Sunset trail was only on one of our three maps for the area, so it wasn't surprising that it was unmaintained and a bit deteriorated.  We had fun crossing over, under and around lots of fallen trees.  No one else was on the hidden trail.
Trailhead Elevation:  7,400 feet
Sunset Lake:  8,280 feet
Total Elevation:  880 feet
Total Miles:  4.6 miles
Total Time:  2 1/2 hours

Saturday, June 25, 2011

Yellow Pine Creek - Partial

We did a great hike up Yellow Pine Creek in the Uintas.  There is a trailhead for Yellow Pine right off Mirror Lake Highway that we have passed many times.  This weekend we finally stopped and did it!  The trail starts right along Yellow Pine Creek and follows the creek up the canyon crossing it numerous times.  We hit snow at about 8,500 feet elevation.  We hiked through the snow as far as we could trying to follow the trail, but finally had to give up as we couldn't find the sharp left to the traverse.  It was a pretty nice hike with lots of elevation gain. 
Trailhead Elevation:  7,040 feet
High Point:  9,000 feet (when we turned around)
Total Elevation:  2,000 (approximate)
Total Miles:  8 miles
Total Time:  5  hours

Friday, June 24, 2011

North Fork

We went camping in the Uintas this weekend for the first time this season.  Since the snowpack is still pretty high, we selected some lower trails for the weekend.  This is a photo of the Provo River at the crossing along the North Fork trail.  Usually this trail is done as a loop.  Given the massive snowmelt flow in the river, we had to turn around at this point.  This is a nice hike to do after work or on a short day.  Very little elevation gain, but a pretty little hike.
Trailhead Elevation:  7,560 ft
High Point Elevation:  7,710 ft
Total Elevation:  150 ft
Total Miles:  3.6 miles
Total Time:  2 hours


Saturday, June 18, 2011

Thaynes Canyon

We did a great hike up Thaynes Canyon in Millcreek Canyon.  It was Father's Day weekend and the canyon was crazy busy.  Instead of doing our usual hike up Desolation Trail, we decided to head up Thaynes Canyon.  The route up Thaynes is much steeper than Desolation, but it provides a bit of a break from the crowds.  We hiked up the narrow drainage for about 2 miles to the junction with Desolation Trail.  At the junction, we turned right and went about a 1.5 miles on a traverse route that eventually meets up with the Overlook.  From the Overlook, it was another 2.5 miles down to the car.  There was still quite a bit of snow near the top of Thaynes Canyon and across the traverse.  We had to do some route finding through the snow and quite a bit of bushwacking through fallen trees across the trail.  But overall, it was a great day of adventure and solitude off the beaten track of  the Desolation Trail.


Trailhead Elevation:  5,856 ft
Highest Point:  7,635 ft
Total Elevation Gain:  1,779 ft
Total Distance:  6 miles
Total Time:  3.5 hours

Friday, June 17, 2011

The Antennas

One of our early season hikes this year has been the the Antennas.  It is called the Antennas because it follows a dirt maintenance road used to get up to the radio towers installed at the top of the foothills overlooking Salt Lake City.  A portion of the hike actually connects with the Bonneville Shoreline Trail system.  I like this hike because not very many people use this area and it has some great views of the valley and the snow-capped Wasatch Mountains.  On our hike today we saw our first snake of the season.  Mary almost stepped on it because I was telling her to "look up at the beautiful mountains" just before I screamed "snake."  It was a pretty good sized one.  It wasn't a rattlesnake, but looked similar to one. 

Trailhead Elevation:  4,920 ft
City Creek Overlook Elevation: 
Total Elevation Gain:  900 ft
Total Distance:  6 miles
Total Time:  3 hours

Sunday, June 12, 2011

Frying Pan and Cohab Canyon - Partial

We were down in Torrey, Utah, this weekend looking at real estate with some friends.  We managed to get in a great hike on Sunday in Capitol Reef National Park.  We did a portion of the Frying Pan Trail and Cohab Canyon.  The trail starts in the Fruita area of the park and climbs to a great viewpoint of the valley and surrounding mesas.  We hiked up Cohab Canyon and then hiked in on the Frying Pan Trail for about 1/2 mile.  We ran out of time to do more exploring, but we will definitely come back to do this one again.  It was a great way to spend the day with friends.

Trailhead Elevation:  5,436 ft
Overlook Elevation:  5,836 ft
Total Elevation Gain:  1,000 ft
Total Distance:  4 miles
Total Time:  2.5 hours

Saturday, June 4, 2011

Grandeur Peak

We made it to the top of Grandeur Peak today.  It was the first nice weekend of the spring/summer and we made the best of it.  Lots of people were out enjoying the trails.  There was still quite a bit of snow on the trail at the top for the final ascent, but we made it.  We did the hike with our friend Leslie who made sure we got to the top.  It took us about 2 1/2 hours to get to the top and total time was about 4 1/2 hours.  Thanks for a great day on the trail.


Trailhead Elevation:  5,960 ft
Peak Elevation:  8,299 ft
Total Elevation Gain:  2,340 ft
Total Distance:  7 miles
Total Time:  4.5 hours


Saturday, May 28, 2011

Up and Over

We did the Up and Over hike today with some friends, including Maren and Stewart and their new dog Gracie.  I think it was a pretty big hike for Gracie -- who probably had never hiked in her life.  The Up and Over has been our standard "go to" hike this spring while we wait for the upper trails to melt off.  It is a great hike in the foothills above the University of Utah that goes up above Red Butte Creek to Van Cott Peak and down the other side along a ridgeline overlooking the Huntsman Cancer Institute.  We have done this hike over 20 times already this year. 

Trailhead Elevation:  4,990 ft
Peak Elevation:  6,348 ft
Total Elevation Gain:  1,358 ft
Total Distance:  4 miles
Total Time:  2.25 hours

Friday, May 20, 2011

Blood Work Results

Kidney, electrolyte, liver function, thyroid and CBC tests were all normal.  Vitamin D deficiency indicated.  Here are the specific results of the blood work:

Blood Sugar Level:  85 (normal is less than 100)
Cholesterol:  169 (normal is less than 200)
Triglycerides:  54 (normal is less than 154)
HDL Cholesterol:  54 (normal is greater than 50)
LDL Cholesterol:  104 (normal is less than 130)

Wednesday, May 18, 2011

Physical Exam

Well, a trip to Africa and a climb to 19,000 feet seems to be good cause for a general pre-trip check up with the doctor.  I went in yesterday for my first physical exam in probably 5 years.  I forgot how many places they can find to poke and prod.  Even though the trip is still nearly 4 months away, I decided to get in to the doctor sooner rather than later just in case something needs to be addressed.  So far, everything looks good.  I just have to wait to get the blood work back.  Interestingly, it feels reassuring to know that everything looks in order.  I consider myself pretty healthy, so I wasn't expecting to feel any sort of relief.  I guess we all harbor a bit of insecurity and doubt when it comes to our health.  I'm definitely glad I got the "once over" if nothing more than to feel more confident about my health and fitness level.  Anything I can do to add to the confidence level for the trip is a plus in my book.  If you can fit it in to the training regimen, I would definitely recommend adding the physical exam to your preparations for the trip. 

Sunday, May 8, 2011

Observation Point

For our final day in Zion, we hike Observation Point.  This trail twists and turns up Echo Canyon on what seems like an interminable trail.  Maybe we were just tired from all the hiking we had done.  After climbing up the canyon, the trail follows the ridge like a horseshoe to Observation Point.  You can see the destination in the distance.  The wind was howling across the ridge at probably 30 mph gusts.  We didn't get to really enjoy the view with the searing wind, but the point does provide expansive views in all directions.


Trailhead Elevation: 4,360 ft
Observation Point Elevation:  6,507 ft
Total Elevation Gain:  2,147 ft
Total Distance:  8 miles
Total Time:  5 hours

Saturday, May 7, 2011

West Rim Spring

On the same day we did Angels Landing, we ventured out on the West Rim Trail to Cabin Spring.  This trail is epic.  We started out from Scout's Lookout at the base of Angels Landing.  After a brief uphill slog, the trail opened up into Telephone Canyon surrounded by white and red cliffs and cascading waterfalls.  It was just beautiful.  After a few hours, the trail comes to a horseshoe and seems to disappear, only to continue to the ridge on a path literally chiseled out of the cliff face.  It was amazing. 


Trailhead Elevation:  4,297 ft
West Rim Elevation:  6,736 ft
Total Elevation Gain:  2,439 ft
Total Distance:  6 miles
Total Time:  4 hours

Angels Landing

We managed to make it up Angels Landing in Zion NP.  It took me two tries.  The first time I was by myself and chickened out.  The second time I was with Mary and I bought a hat like my friend suggested and DID NOT LOOK DOWN.  I just followed Mary's footsteps up the craggly ridges.  For those of us afraid of heights, this one takes the cake. I'm glad I can say I have done this one!


Trailhead Elevation:  4,297
Angels Landing Elevation:  5,785 ft
Total Elevation Gain:  1,488 ft
Total Distance:  5.4 miles
Total Time:  3 hours

Saturday, April 30, 2011

San Rafael Swell - Again

We made a quick trip down to the Swell to retrieve the T@b.  We did a great hike along the San Rafael River from the Bridge to the mouth of the Little Grand Canyon.  We made it in about 3 1/2 miles and then turned around.  Total time for the hike was about 3 hours 45 minutes.  Minimal elevation gain but some beautiful scenery.

Tuesday, April 26, 2011

Immunizations

I hate getting shots.  But if you are going to travel you are going to have to get poked a few times.  Deciding what immunizations to get and which ones to skip is almost like trying to pick a good mutual fund in a bear market.  The CDC has decent information on their travel website for Tanzania. Then you will want to talk to your own physician or to your physician friends going on the trip with you (handy to have).  At this point I tossed the coin up in the air and decided I would rather be safe than sorry. 

Here is a running list of what I decided to go with for the trip:

3/22/11  Hepatitis A (Twinrix combined shot with Hep B) ($63)
3/22/11  Hepatitis B (Twinrix combined shot with Hep A)
3/22/11  Tetanus, Diphtheria, Pertussis ($37)

4/25/11  Hepatitis A & B (Twinrix combo shot) ($63)
4/25/11  Polio Booster ($39)
4/25/11  Meningococcal ($122)

7/29/11  Typhoid
7/29/11  Yellow Fever

Sunday, April 24, 2011

San Rafael Swell

Although the San Rafael Swell area may not be great elevation training for Kilimanjaro, we did have some fun in the red rock county of southern Utah.  We managed to get about 12 miles of hiking in over the weekend (in between rain storms and unseasonably cold weather). 

Sunday, April 10, 2011

Desolation Trail

We did a hike up Millcreek Canyon this weekend with Karla, who is also going on the Kilimanjaro trip with us.  It is great to get to do some training together and to talk about fun new gear purchases.  We hiked up to the overlook and that was as far as the trail had been broken.  Still another snow packed day on the trial.  Karla managed to do this hike after a grueling 9 mile trail run earlier that morning.  Crazy.


Trailhead Elevation:  5,785 ft
Overlook Elevation:  7,024 ft
Total Elevation Gain:  1,239 ft
Total Distance:  4.8 miles
Total Time:  2.5 hours

Sunday, March 27, 2011

Grandeur Peak - Partial

Well, this is what spring hiking looks like this year around Salt Lake City, Utah.  We have been hiking all winter and are counting the days to warmer weather and hard pack trails.  We did two hikes up Millcreek Canyon this weekend and the snow level for late-March is ridiculous.  This is a picture of me at the overlook on the way to Grandeur Peak.  We didn't make it to the top of the peak since the trail had not been broken in yet.  It would have been tough going in deep snow. 
Trailhead Elevation:  5,960 ft
Peak Elevation:  8,299 ft
Total Elevation Gain:  2,340 ft
Total Distance:  6 miles
Total Time:  3 hours

Zamberlan Skill GT Women's Boot

The most important piece of gear for this trip has to be the boots.  I spent 3 months trying to find the right boot.  I tried on dozens of boots and thought I might not ever find a comfortable boot to fit my narrow high-arched foot.  I currently have a pair of Vasque old-school full leather sundowner boots that I love, but wanted to find something with a little more padding.  I think I found the match made in heaven with the Zamberlan Skill GT boot.  These guys are a piece of art.  Handmade tooled leather from Italy.  I hardly want to get them dirty.  But, they are also a top-notch working boot with some high-tech innovations that make these a lightweight full-grain leather boot  that is amazingly comfortable, breathable and durable. 


Specifications on the boots:

One-piece hydrobloc full-grain leather
Padded and gusseted tongues
Gortex and nylon linings
2 lbs 10 oz

OutdoorGearJunction Review:

A classic Italian made mid-height boot, the women’s 310 SKILL GT is a full-grain water-resistant leather boot with a waterproof breathable GORE-TEX.liner to keep your feet dry and comfortable on those rainy days. The breathable liner and moisture wicking anatomic footbeds also help maintain an comfortable environment for your feet on those hot and humid days. Built on a women’s specific last and constructed with the Zamberlan Full-Wrap technology, this boot will hug your feet and over time, will only get better as the leather upper molds to the shape of your foot. Don’t be fooled, however, despite the durable leather Upper, this boot comes in at well under 3 lbs making this an ideal lightweight boot for both short hikes and longer backpacking trips. The exclusively developed VIBRAM L.H.07 outsole with an EVA wedge absorbs the impact of the foot on hard terrain while providing great traction and stability on a variety of terrain.

Links:

Zamberlan
REI boot description

Saturday, March 26, 2011

Sleeping Bag - REI Expedition -20

I debated long and hard about whether to buy a sleeping bag for the trip or to just rent one from Team Kilimanjaro.  I decided to rent one since I don't really camp much and a good bag is expensive.  That said, I found a used expedition bag on sale at the REI garage sale this weekend and bought it!!  It is the REI Expedition -20 bag and it is gorgeous.  This bag has gotten some great reviews on backpacker.com and other sites. 


Specifications on the bag:

800 fill power goose down on top (700 fill on bottom)
DWR ripstop nylon shell
3 lbs 10 oz

Backpacker.com review: 

It goes without saying that on a high-mountain trip, a warm bag is the difference between sleeping and shivering. Yet many climbers continue to lose precious zzzzs because they want to save weight or money–or both–on a cold-weather bag. If that's you, get the Kilo Expedition and say goodnight. The 800-fill down bag is conservatively rated, and has a cut that's efficient but roomy enough for layering clothes. The nylon shell's DWR coating easily repelled tent-floor condensation and canopy frost. The Kilo closes with dual parallel zippers rather than a standard zipper and flap. The design eliminates cold spots, and also allows you to mircomanage fit and warmth (open or close the inner zipper). There was minor down leakage, and the zippers occasionally stuck, but neither problem is unusual in ultra-poofy winter bags. Bonus: It comes with a silnylon compression stuffsack. $359; 3 lbs. 12 oz. (regular); 3 sizes (short, regular, long).

Links:

REI Expedition -20 
Backpacker Gear Review

Tuesday, February 1, 2011

Rongai Route

There are six authorized routes for climbing Kilimanjaro.  Picking which route to take is a matter of preference, logistics, time and money.  Based on our research, we narrowed the choices down to the Lemosho Route and Rongai Route.  Based on strong recommendations from Team Kilimanjaro, we decided to take the Rongai Route.  The Rongai is the only route approaching the mountain from the north and requires a 2 1/2 hour drive from Arusha to the start of the climb.  It is one of the longer routes (50 miles), requiring 6 or 7 days on the mountain to complete, but also provides for one of the more gentle ascent and decent routes on the moutnain.  Unfortunately, the designated descent route for the Rongai is the Marangu (also known as the Coca-Cola route due to its popularity with tourists).   But, from what we have read, the Rongai appears to provide one of the best routes for acclimitization with a great success rate for summiting.  Team Kilimanjaro will not release its exact route they like to follow, but the following chart from Ultimate Kilimanjaro is pretty close to what we will be doing.

Monday, January 10, 2011

Selecting Tour Operator

Probably the most important decision in planning a trek of Kilimanjaro is selecting a reputable and experienced tour operator.  After reviewing operator recommendations in our guidebooks, picking our desired price range, and researching an inordinant number of tour operators on the web, we finally decided to go with Team Kilimanjaro for our climb.  They have a great website and have been running trips on the mountain for more than 10 years.  They claim they do about 200 climbs per year.  Check them out at teamkilimanjaro.com.